
Cooler Packing Checklist for an Amish Market Trip
Use this practical farmers market cooler packing checklist to organize produce, dairy, meat, baked goods, and other purchases during a multi-stop Amish country shopping day.
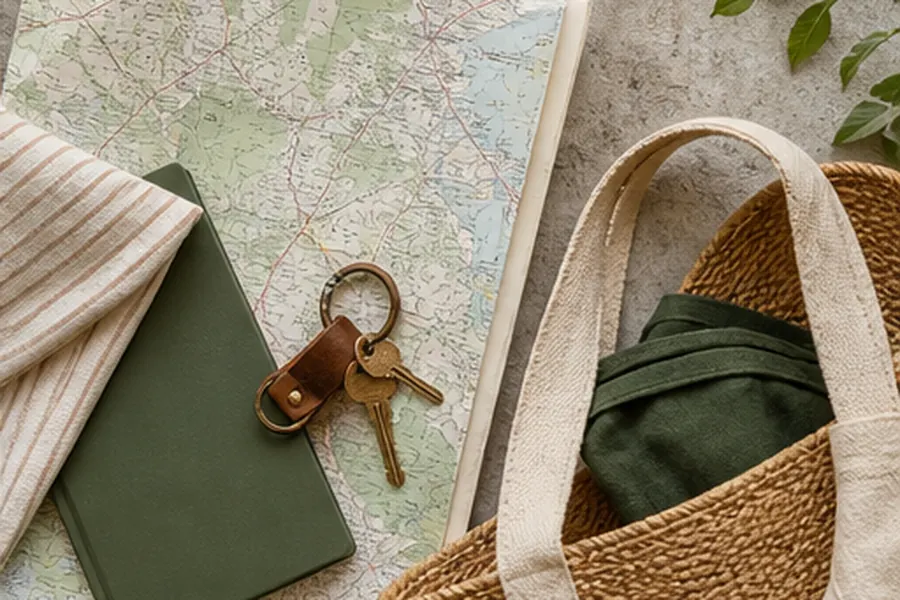
A day of shopping in Amish country can fill your vehicle faster than expected. One stop may add sweet corn and peaches, the next may have cheese and butter, and a later market could tempt you with fresh meat, pies, bread, or frozen foods.
A little organization helps everything arrive home in good condition. The key is to plan for different kinds of purchases instead of treating the whole trunk as one large grocery bag.
This guide offers a practical cooler system for drivers planning a multi-stop Amish market trip. It covers cold food transport, fragile produce, baked goods, trunk organization, hot-weather planning, and cleanup—without making your shopping day feel overly complicated.
Before leaving, use the Amish Store Locator to search for stores and markets, explore listings near your current location, or browse Amish businesses by state.
Farmers market cooler packing checklist for a full shopping day
Use this printable-style checklist while preparing your vehicle. You may not need every item for every trip, but packing a few extras can be helpful when you find an unexpected market or roadside stand.
Coolers and temperature-control supplies
- One insulated cooler for refrigerated products
- A second cooler or insulated bag for frozen purchases
- Several fully frozen ice packs
- Extra ice packs in a separate insulated container
- Small insulated bags for dividing purchases
- Clean towels to fill empty cooler space
- A cooler thermometer, if recommended for products you plan to buy
- Resealable bags for containing leaks or condensation
- A waterproof liner or tray for the bottom of the cooler
- Product labels and storage instructions kept with each item
Dry-goods and baked-goods supplies
- Reusable shopping bags
- Separate clean bags for bread and baked goods
- A rigid box or shallow bin for pies, cakes, and pastries
- Paper bags for items that should not sit in trapped moisture
- A lidded tote for flour, noodles, canned goods, and pantry staples
- Wax paper, parchment, or clean food-storage bags for repacking if needed
- Bag clips or ties
- A marker and removable labels
Produce-packing supplies
- Shallow crates or sturdy open-top boxes
- Small baskets or containers for berries and tomatoes
- Clean dish towels for cushioning
- Paper bags for separating produce
- Reusable mesh produce bags
- A firm divider to prevent heavy items from rolling
- An empty box reserved for fragile purchases
- Damp-proof protection between produce and cooler condensation
Vehicle and cleanup supplies
- Nonslip trunk mat or cargo liner
- Bungee cords or cargo straps
- Hand wipes or hand sanitizer
- Paper towels
- Trash bags
- An extra towel for spills
- A laundry basket or cargo bin for securing loose bags
- A written shopping list
- Store addresses or a saved route
- Space reserved for purchases you did not plan to make
If you are building a longer itinerary, pair this checklist with our weekend Amish store route planner. First-time visitors may also want to review what to bring to an Amish country store.
Create cooler zones before you leave home
A well-packed farm market cooler works best when it has defined zones. Creating those zones at home is easier than trying to rearrange cheese, frozen meat, and jars in a busy parking lot.
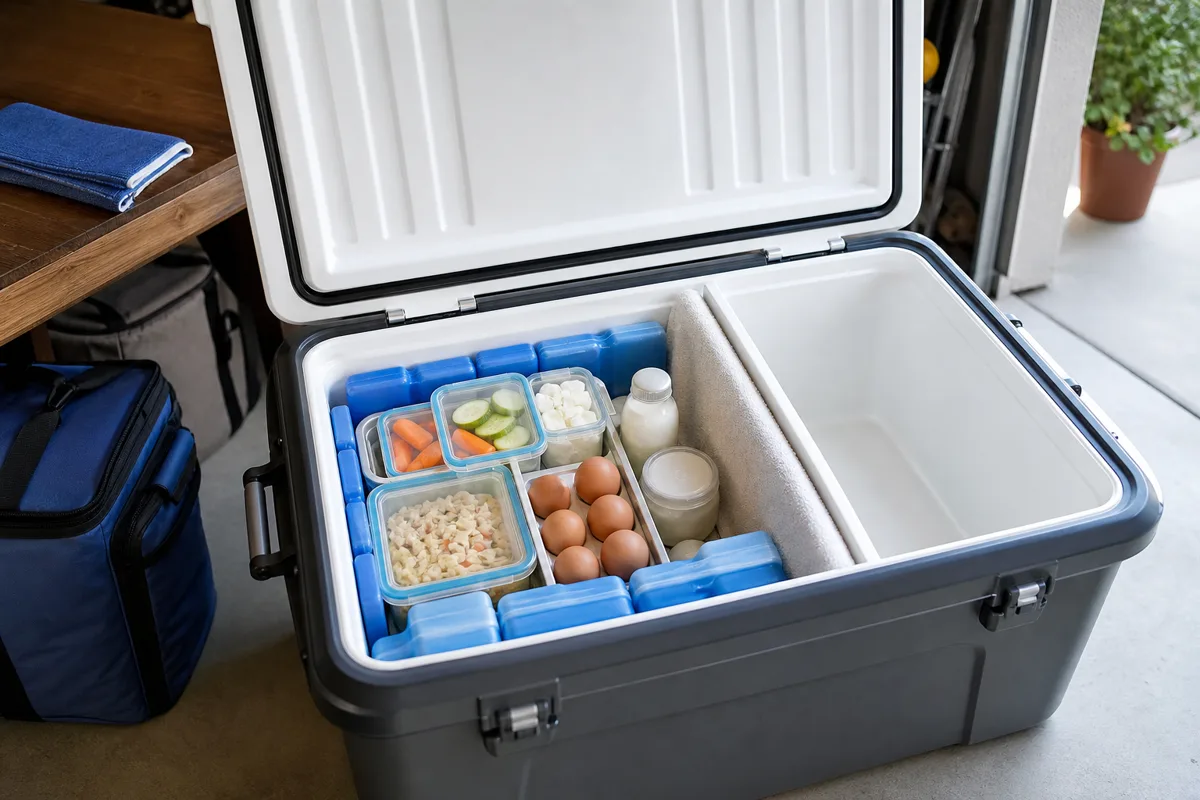
Frozen zone
Reserve the coldest, most insulated part of your setup for frozen purchases. Place fully frozen ice packs around this zone before departure, and keep the lid closed as much as practical.
If you expect to buy a substantial amount of frozen food, use a dedicated cooler. Mixing frozen products with frequently accessed drinks or snacks can lead to unnecessary opening and rearranging.
Always follow the product label, seller-provided handling directions, and current official food-safety guidance. Different products may have different transport and storage requirements.
Refrigerated zone
Use a second zone for cheese, butter, milk, eggs, meat, prepared foods, and other items sold with refrigeration instructions. Keep raw products securely wrapped and separated from ready-to-eat foods.
A waterproof tray or sealed bag can provide another layer of protection against leaks. Do not assume that paper market wrapping is designed for a long drive or a crowded cooler.
Flexible buffer zone
Leave some room for an unplanned purchase. A small insulated bag can serve as a flexible buffer for specialty cheese, a chilled dessert, or another item you did not know would be available.
Use clean towels or additional ice packs to fill empty spaces and limit shifting. Avoid packing so tightly that soft packages are crushed.
Nonfood drink zone
If possible, keep personal drinks in a separate cooler. You will probably open a drink cooler throughout the day, while a food cooler is most useful when it stays closed and organized.
Freeze your ice packs ahead of time
Check your ice packs before the morning of your trip. Large packs can require more freezer space and preparation than expected, especially when packing multiple coolers.
Use fully frozen packs rather than partially chilled ones. Select shapes that fit your setup: flat packs work well along walls and under trays, while smaller packs can fill spaces between products.
Pack extra frozen ice packs in an insulated container that will remain closed until needed. This gives you an option if the day runs longer than planned or if you purchase more cold food than expected.
Loose ice may create meltwater and damaged packaging, so consider whether sealed ice packs are better for your purchases. If you use ice, protect foods from water and cross-contamination. Product labels and official food-safety guidance should determine how perishable items are transported—not guesswork or a one-size-fits-all rule.
Keep dry goods in separate bags and bins
Not every market purchase belongs in a cooler. Bread, cookies, noodles, candy, canned goods, spices, and many shelf-stable foods travel better in a dry area.
Create at least three dry-storage groups:
- Crushable baked goods: Bread, rolls, cookies, doughnuts, and pastries.
- Heavy pantry goods: Jars, cans, flour, grains, and bulk packages.
- General merchandise: Cookbooks, crafts, candles, soaps, and household items.
Never place a warm loaf under jars or produce. A shallow rigid bin helps baked goods keep their shape, while a separate tote prevents canned goods from rolling into delicate packages.
Ask the seller about storage when you are unsure whether an item needs refrigeration. Keep any handling label attached and follow it. Packaging and storage needs can vary, including among similar-looking baked or prepared products.
Pack fragile produce by weight and firmness
Produce is often damaged by pressure rather than by the drive itself. A few peaches at the bottom of a bag can be bruised by apples, melons, or jars placed on top.
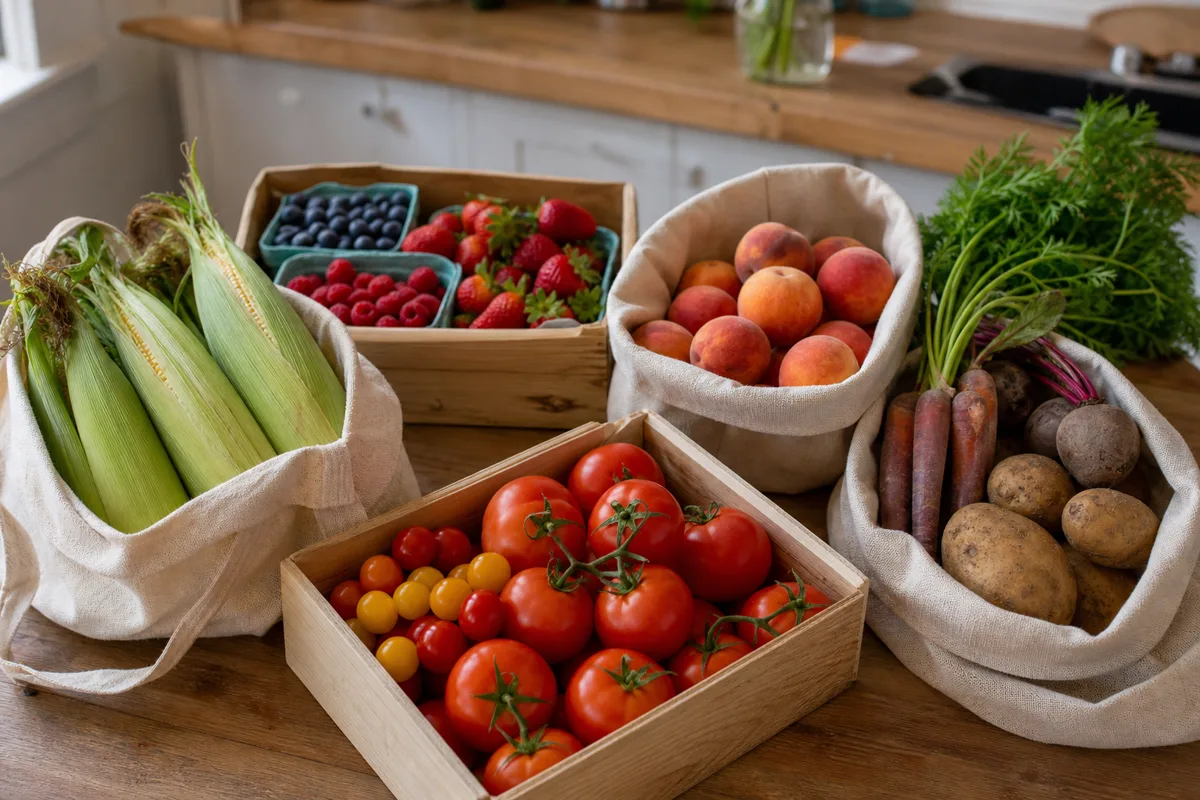
Organize produce into practical groups:
- Very fragile: Berries, ripe peaches, plums, tender greens, and delicate tomatoes
- Moderately sturdy: Cucumbers, peppers, zucchini, apples, and green beans
- Heavy or firm: Melons, cabbage, potatoes, onions, squash, and sweet corn
Put heavy produce on the vehicle floor or in a sturdy crate. Place fragile items in shallow containers where nothing can be stacked on them. Use clean towels to cushion glass containers or delicate fruit, but avoid wrapping produce so tightly that heat and moisture become trapped.
Keep produce away from leaking meat packages and cooler meltwater. If a particular fruit or vegetable comes with storage directions, follow those directions.
For seasonal trip ideas, use the Amish farm market season calendar or browse businesses listed as a farm market.
Arrange the trunk for stability and access
Coolers should sit on a flat, stable surface where they will not slide, tip, or be struck by loose cargo. Place them against a solid part of the cargo area and use straps, nonslip mats, or surrounding bins to limit movement.
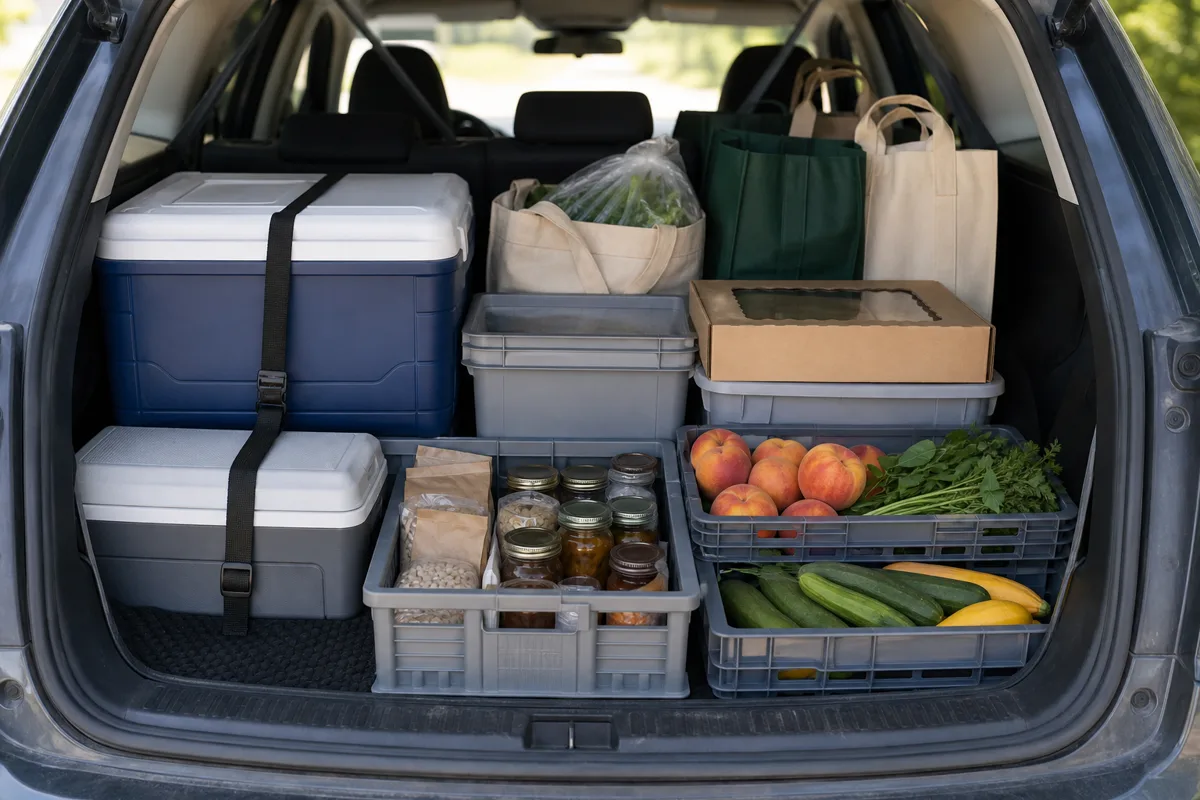
A useful trunk layout is:
- Back or most stable area: Heavy coolers
- Vehicle floor: Firm produce crates and heavy pantry goods
- Protected side area: Bread, pies, and pastries
- Easy-access area: Empty bags, labels, wipes, and the next stop’s shopping list
- Passenger compartment: Only items that can be transported safely without becoming loose projectiles
Avoid placing the cooler where direct sun pours through a window. If your vehicle has a covered cargo area, use the cover. Do not block the driver’s visibility or interfere with emergency supplies.
Remember that a parked vehicle can become very warm. Minimize unnecessary delays after purchasing products that require cold food transport, and follow official food-safety guidance and product-specific instructions.
Plan refrigerated and frozen purchases for the last stops
Route order matters. If possible, visit antique shops, craft stores, bulk-food stores, and dry-goods businesses earlier in the day. Schedule markets where you expect to buy refrigerated, frozen, or highly perishable products closer to the end.
Last-stop planning does not mean you must ignore a special item at an early market. Instead, it helps you decide whether your cooler setup and remaining drive are suitable before buying it.
A practical route might follow this order:
- Crafts, furniture, and general merchandise
- Shelf-stable bulk foods
- Produce stands
- Baked goods
- Refrigerated products
- Frozen foods or fresh meat
- Direct drive home
Actual store hours and locations may require a different sequence. Check listings, map the route, and allow for limited hours or seasonal availability. You can begin with the Amish Store Locator search, then compare locations without assuming every market carries the same products.
Label purchases as you load them
A marker and removable labels can prevent confusion when several packages look alike.
Label bags or containers with:
- Product name
- Store or market
- Purchase order or stop number
- Storage directions from the label or seller
- Intended recipient, if shopping for multiple households
- “Fragile,” “keep upright,” or “open first,” when appropriate
Do not cover original labels, ingredient information, dates, or handling directions. The purpose of your note is to add organization, not replace the product’s packaging.
Numbering purchases by stop can also help if you need to remember where a favorite cheese, jam, or loaf came from.
Prepare for hot-weather market shopping
Summer market shopping calls for a more deliberate plan. Start with a clean vehicle, pre-chilled coolers when practical, and fully frozen ice packs. Park in shade when available, but do not rely on shade alone to protect perishable food.
Keep market browsing and meal stops in mind when choosing your route. A long sit-down break after buying cold products may not fit your transport plan. Consider having lunch before your final refrigerated and frozen stops.
Other hot-weather habits include:
- Keep cooler lids closed between stops.
- Avoid opening the food cooler for drinks.
- Move purchases into the correct zone immediately.
- Do not leave products scattered on seats while reorganizing.
- Bring more insulated capacity than your shopping list appears to require.
- Head home when your cooler is full rather than compressing or overloading it.
- Follow all labels and current official food-safety recommendations for perishable products.
Weather can change the practicality of a route. On especially hot days, a shorter shopping loop may be better than trying to visit every saved location.
Unload and clean up promptly
When you arrive home, unload refrigerated and frozen products first. Read labels again and store each product as directed. Then bring in produce, baked goods, jars, and dry groceries.
Inspect reusable bags and coolers for moisture or leaks. Clean them according to the manufacturer’s directions, and allow them to dry completely before storage. Wash towels and reusable liners that came into contact with food packaging, spills, or cooler water.
A simple cleanup routine includes:
- Remove all food and loose packaging.
- Wipe up spills.
- Wash cooler surfaces as directed by the manufacturer.
- Clean trays, baskets, and reusable bags as appropriate.
- Dry everything thoroughly.
- Return ice packs to the freezer.
- Restock labels, wipes, and trash bags for the next trip.
Before discarding receipts or bags, save the names of markets you want to revisit. That small step makes your next Amish market trip easier to plan.
Frequently asked questions
Do I need more than one cooler for an Amish market trip?
Not always, but separate coolers can make organization easier. One can remain closed for frozen or refrigerated purchases while another holds drinks. A second insulated container also helps separate raw products, ready-to-eat foods, and items with different handling instructions. Choose a setup based on your planned purchases and follow product labels and official food-safety guidance.
Should produce go inside the cooler?
It depends on the type of produce, its condition, the weather, and any storage directions provided. Some purchases may benefit from cool transport, while others need protection from moisture or crushing more than refrigeration. Keep produce away from leaks and meltwater, and ask the seller when you are uncertain.
How do I transport pies, bread, and other baked goods?
Use a clean, rigid box or shallow bin that stays level. Keep heavy groceries away from baked goods, and do not stack bags on top of pie boxes. Ask whether a particular product requires refrigeration, especially if it contains a filling, topping, or other perishable component. Follow the label or seller’s handling directions.
What should I do if I buy cold food early in the day?
Place it in the appropriate prepared cooler zone immediately, keep the cooler closed, and reconsider the rest of your route. You may need to shorten the trip or move remaining nonessential stops to another day. Do not rely on a general time estimate; follow product-specific labels and current official food-safety guidance for transport and storage.
Pack once, shop with less stress
The best food road trip packing system is one you can understand at a glance. Give cold products dedicated cooler space, keep frozen ice packs ready, separate dry goods, protect fragile produce, and secure everything before driving.
Most importantly, plan your final stops around purchases that require refrigeration or careful handling. With a stable trunk layout and a printable checklist, you can spend less time rearranging bags in parking lots—and more time enjoying your Amish country shopping day.